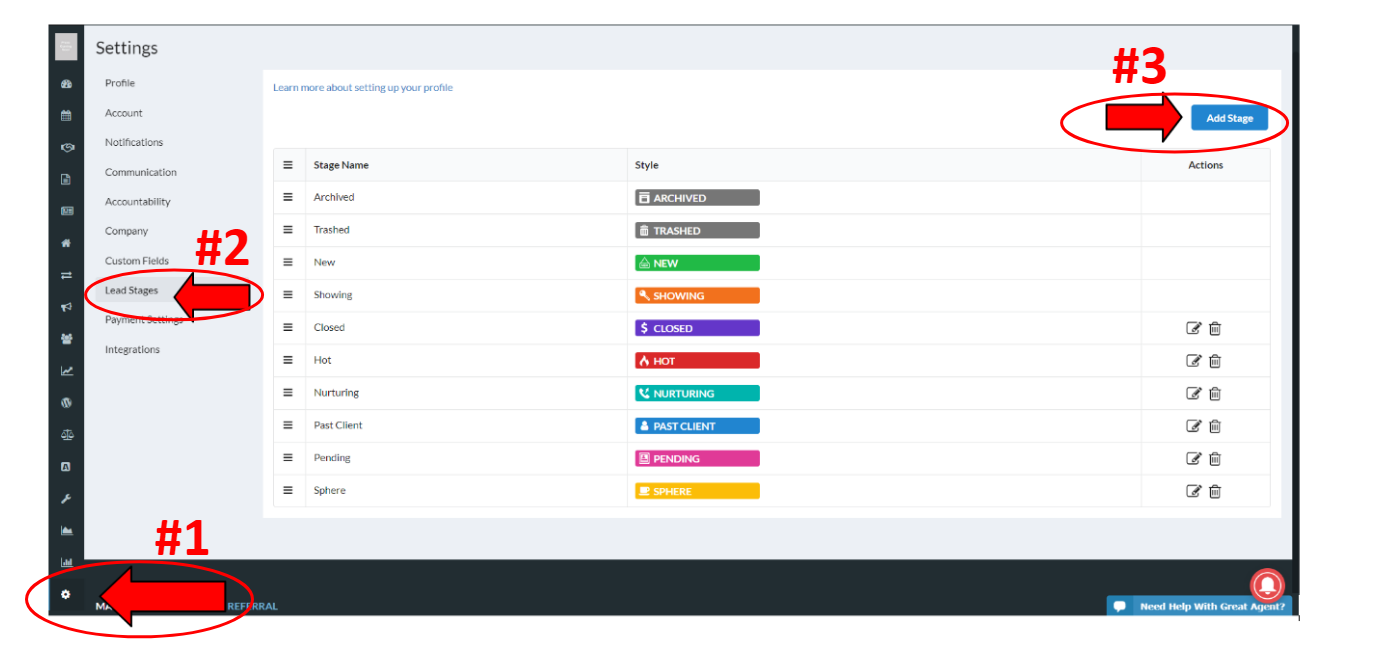
1. Create Custom Stages (for Brokers)
Now, as a broker, you are able to create your own customer stages in 3 simple steps.
1. Go into your account settings (See #1 in image below)
2. Click "Lead Stages" (See #2 in image below)
3. Click "Add Stage" (See #3 in image below)
2. Remembered Collapsed Sections
You are now able to edit the view of your leads by simply collapsing an area that you don't need/want to see. Once you collapse it in one, it is remembered across them all.
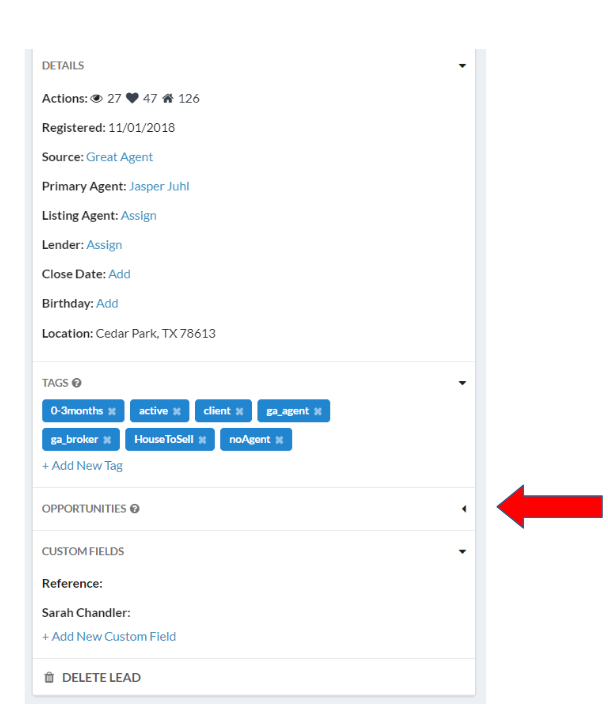
1. Simply click into any lead.
2. On the left side of the screen find the arrow by the criteria you would like to collapse:
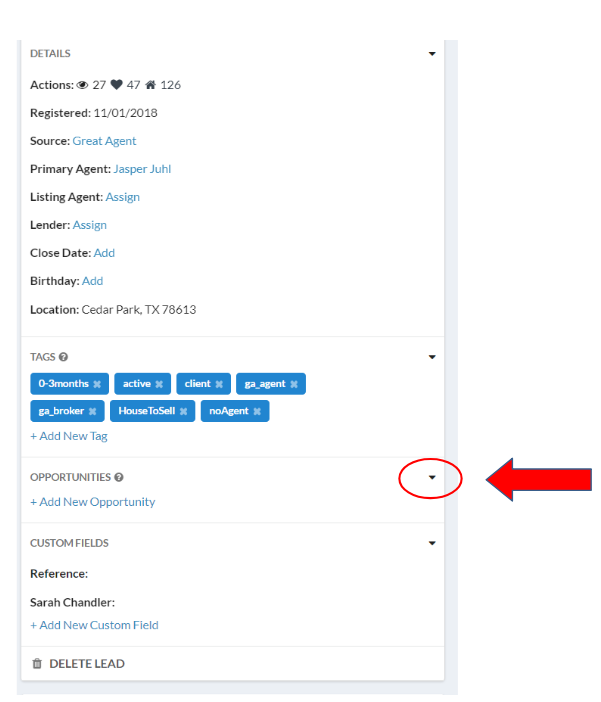
3. Once you click the arrow to collapse it, you will see that the section has been collapsed and hidden from view. This allows you to customize the view of your leads to show information you want and don't want to view.
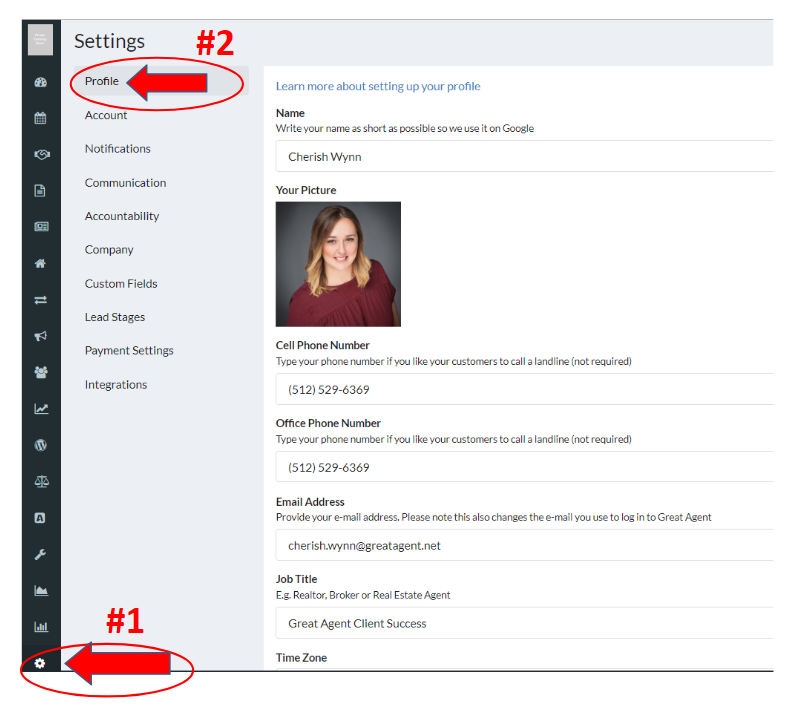
3. See & Edit Virtual Phone Number
You are now able to see and edit your virtual phone number.
1. Go into your account settings (See #1 in image below)
2. Click "Profile" (See #2 in image below)
3. Scroll down until you find "Virtual Phone Number" (See #3 in image below)
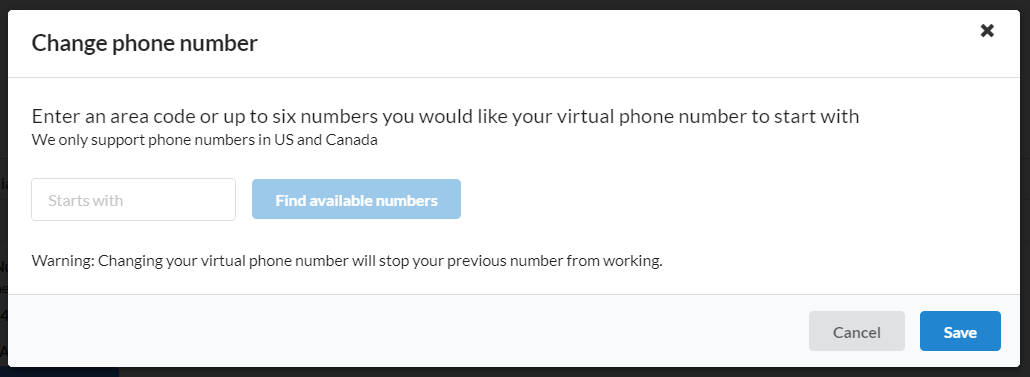
4. Create the Virtual Phone Number and then click Save
Scroll down your profile until you see the Virtual Phone Number and click the pencil image:
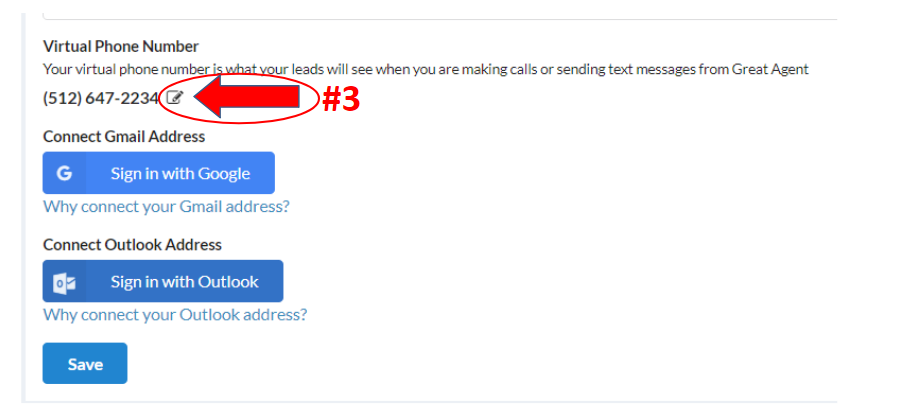
Fill out the form that pops up. Once complete, click "Save".
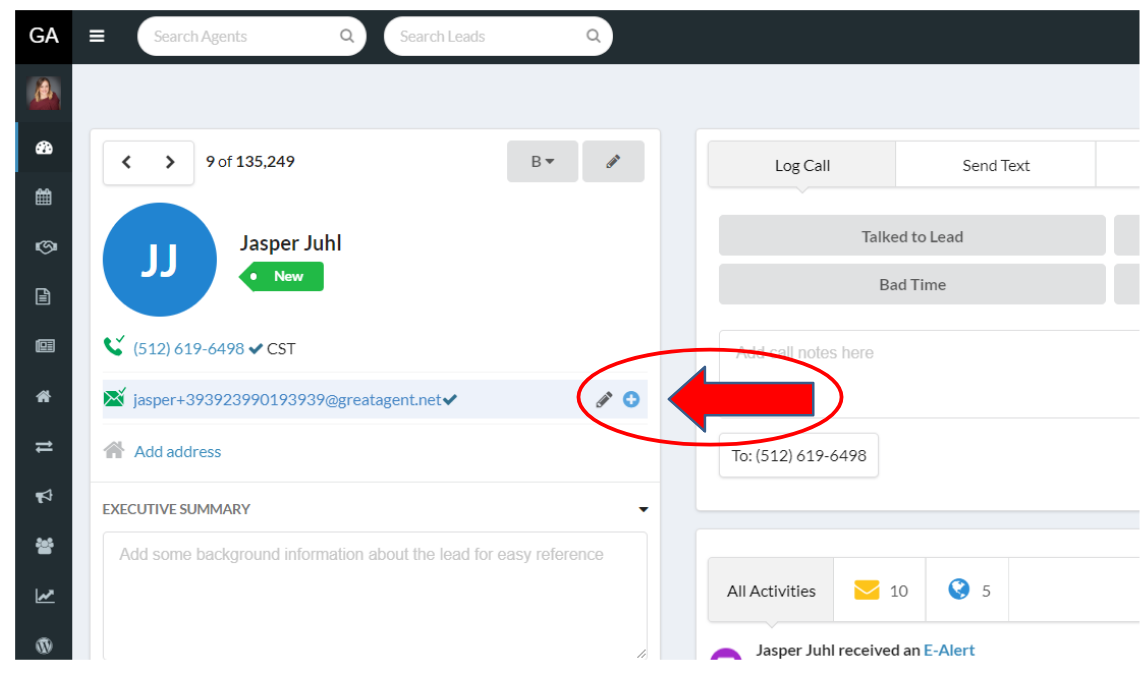
4. Separate Add/Edit Options in a Lead's Profile
You are now able to edit individual data fields in the lead's profile.
1) Hover your mouse pointer over the phone number, email, address, etc in the lead contact area and the edit pencil and a blue plus appears. You are now able to edit or add additional information from here directly rather than clicking edit and the page opening with all of the contact information.
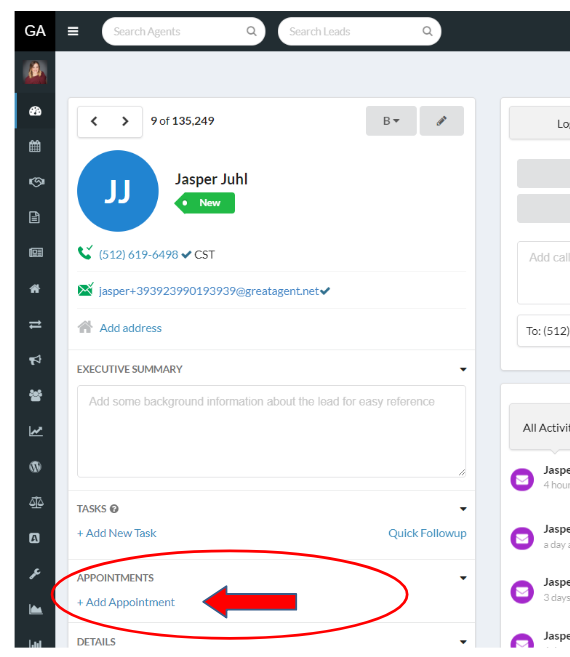
5. Add An Appointment Directly on Lead's Profile
Once you are in your lead's profile, you can simply add an appointment directly from their profile by selecting "Add Appointment".
Comments
0 comments
Please sign in to leave a comment.